
On this page, you can find out how I started working in Pyrography, and see the details of how I created many of the items shown on these pages. I also have various hints & tips for Pyrography and other crafts, so you can avoid some of the mistakes I made!
At the Alexandra Palace 2002 Woodworking Show, I tried pyrography for the first time, and found it interesting. It didn't seem that hard, you get nice results, it's not messy, nor noisy, it doesn't require great artistic talent, and you can pick it up & put it down without spending half an hour setting out & tidying away. I looked around for a way of using the power supplies & such we had in the garage to have a go, but we couldn't find the right sort of wire, and trying to make the pen sounded like a real pain, too.
Then Bill, my beloved, gave me a Peter Childs Pyrography machine for Christmas, that he'd bought from Simbles in Watford, and Mum & Dad gave me a pattern book by Norma Gregory. Great presents - wonderful! I find the Peter Childs machine really easy to use.
I created several pieces of work in the first 3 months, first experimenting on some scrap wood, and then working on the various pieces of wood I could find around the garage.
The Unicorn's simple cartoon design gave me a chance to practise controlling the pen, and altering the colour of the burn.
Then, to practice fine lines and gain more control, I tried a Celtic Triangle knot of my own design, on some salvaged plywood sanded smooth with Bill's electric orbital sander (and good right arm!). I found that a good strong light (just like the one Bill used to have in his garage) was necessary, and a repetitive sweeping motion with the pen was ideal for long, smooth lines. The tip definitely has to be moving before it reaches the wood. It wasn't perfect, but I felt much more confident about using the machine.
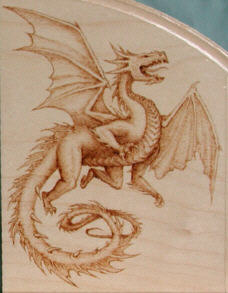
I was so pleased with this that I went on to make the Dozing Dragon, also from a design I found on the Internet, on another piece of plywood. I had trouble with the grain of the plywood, though.
So, I thought that perhaps it would be better to try & work with the grain of the wood, and made Bill's Eagle and Mountain Dragon.
Then, realising I now had some nice designs stuck in the middle of great big chunks of plywood, I cut out and sanded all these pieces. Some time afterwards, I decided that what the square pictures needed was framing, as the raw edges of plywood aren't all that appealing. Fiddly, but it worked OK in the end.
The Mother's and Father's Day Cards were made from some very thin slips of old oak that Dad gave me, as offcuts from a project he's working on. I felt sure that I should be able to make them into something nice, but what? They were too thin for most things, and it occurred to me that they were more like thick card than anything else. So, with Mother's Day coming up, I thought I'd make a card for my Mum. And a matching one for Dad, to store away until Father's Day comes round. They measure 3�" x 3", and the designs were based on some drawings of daffodils and wheat I found on the Internet. I changed these considerably, to suit my thoughts, and the limitations of the wood I was using. To make the professional-looking lettering, I used MSWord, printing the text out in a large font.
Anyway, I gave all four pieces a couple of coats of water-based PVA clear satin varnish on both sides. They warped alarmingly when the first coat went on each side, but soon straightened out again as the varnish dried. Then I hinged the fronts and backs together with some satin ribbon and PVA glue, to make a matching pair of cards. Mum & Dad seem to be pleased with them, so I guess that counts as a success. Lasts a bit longer than your average bit of cardboard, too...
At around this time, my great-aunt Rosy was moving to a new flat, and as I live over 100 miles away and couldn't be there, I thought that I'd like to send her a little something for her new place. I thought that a keyplate would be nice, and that it should have her namesake rose on it, so I looked around for a rose design. I added this to her full name on a rounded piece of that good old plywood, to make Rosemary's KeyPlate. I picked a piece with gentle waves in it's grain, and spaced out holes for hooks below the design, and some fastening holes at either side. I tried quite hard to make the lettering and rose be an even colour, to stand out from the grain pattern, but it's harder than it sounds! Again, that's why plywood isn't really such a great choice - but it's what I had...
I packed it up in a nice padded parcel, and sent it off in the post. It seems that Aunt Rosy was pleased, and I believe that it's now all assembled and in her hallway.
Bill & I went to Basildon one Saturday, and visted the new Hobbycraft shop that opened there recently. They have all sorts of craft stuff, some rather overpriced, but interesting to look round. I saw some little wooden odds & ends made by Lara's Crafts there, including small turned eggs, about 1�" tall. As this was just before Easter, I bought half a dozen, thinking I'd see if they'd take a burn, and maybe make some Easter Eggs for my family. They worked fine, and I found all sorts of Easter-type images here & there, enough to put two designs on each. When I'd finished, I decided to try colouring them, as it seemed to me that Easter eggs should be colourful. I used some artist's coloured pencils I'd bought in one of those cheap-shops, which seemed to work quite well.
I had to force some dressmaker's pins into the bottoms of the eggs with pliers, and then hold these pins in clamps, to be able to varnish (PVA again!) them. Less than subtle, but it seemed to work OK, and they're pretty well protected. I shared them out around my family at Easter, and they seemed to be well-recieved.
When the "bus gang" (the ladies that I see every morning on my way to work, and have struck up a friendship with) saw these, I then had to make half a dozen more! Bill even had to go back to Basildon to get the eggs - sadly, the local shops don't have much in the way of craft supplies, so Bill got volunteered to stop off for them on his way home. What would I do without him?
The next project was to be an actual commission - a door plate for the son of a friend, with a group of dinosaurs on it. I used a piece of thin obeche wood (from a craft shop), about 3" x 8", for this. It's lucky I had bought the thicker wire, as the design was quite complex, with a more realistic feel. This one took some time, as the dinosaurs are so large and complex. The design I was using wasn't very detailed, so I had to extrapolate a lot, and do a lot freehand, but I think it came out OK.
This type of work, with all the shading, takes far longer than the previous "line" work, but does look very nice when it's finished. The thick wire really does let you make very subtle shading, but this doesn't come out too well in the pictures here. (I've kept them fairly low resolution, to avoid long download times - the originals are fine.)
It's signed on the back by Adem's Mum & Dad, and is now fixed to his bedroom door with sticky pads. I hear that Adem liked it a lot, and that's the main thing!
The spoon and spatula were purchased from Wilkinson's and QD, who each stock a wide variety of such domestic items, and sanded smooth before starting work. I think they're either beech or birch - whichever they are, they take a very nice burn, allowing lots of shade variation and fine lines. The toadstool design on the front & back of the spatula comes from Norma Gregory's nice pattern book, as did the squirrel on the spoon. The mouse came from a design I saw on some junk mail. I gave them away as gifts, to my relatives.
The small round wooden boxes came from Dalescraft, and I decided to decorate them with my own celtic designs on the top & bottom. I reversed the colouring of the design from the top to the bottom, to make matching pairs with a difference - I rather like the effect. I used these as gift-boxes for rather unusual gifts - the One Ring, from Tolkein's Lord of the Rings... well, more like the Four Rings, I suppose!
The Map Dragon was done on an artists' palette, from "The Works" bookshop. It's so big that it was impossible to scan! This was mostly done with thick wire on a low heat, and there is so much shading that it took a very long while to complete. The design is an adaptation of an image sent to me by a friend a long while ago - I have no clue where it originates from.
I used carbon paper to transfer the design - this was a mistake, as it is indelible, and very hard to even burn out. I've since found that graphite paper is far better, although expensive and giving a far finer line.
While out & about in Watford in summer, about 8 or 9 months after I started pyrography, Bill found a flexible drive in one of those sells-everything toolshops, and bought it for me. We already have several mini drills of various types, and quite a few little tiny drill-bits, sanding things, funny-shaped stone whatsits on little shafts, some dentists' drills (that I talked my dentist out of!) and so on - even some diamond burrs.
So, now I can use the drillbits, etc, to do fine work, ie without having to hold the entire drill in my hand, I've had fun trying to engrave various items! Although I haven't had a chance to do much so far.
I engraved the little dragon glass for my sister, Wendy, with a dragon design. This was an adaptation of a sketch I found on the internet somewhere. I used several diamond-coated burrs, and tried tipp-ex and marker pen to transfer the design. Oddly, the marker pen worked better, and made less mess, despite being black instead of the recommended white.
I'll have to have another go at this - I have some more glass things, and a few metal items, too.
In the late summer, I recieved some special vegetable-tanned leather items and offcuts, and started experimenting with those. The small flower was my first attempt, after some scribbling on scraps. I was just practising on a scrap piece of leather, but afterwards decided I liked it, and so I cut it out to keep.
The cat at the window was a try at doing line work on leather. Fiddly! You have no way of recovering if you get it wrong, and every little slip shows up with crystal clarity. Again, this was another piece of scrap leather.
You need a very cool tip for this - even the thickest wire is too hot. These were made with thinner wire, and using the special heat-reducing diode box I got from Roy Childs. This works SO well for leather...
The little dragon bracelets were made for a colleague's daughters, as a thank-you gift. The names and dragons were "burnished" with a cool, wide point, to get the lightly-coloured, shiny effect without too much darkness.
I made the dragon purse for myself, just for a change. I remembered that I had a picture of the small dragon with his first coin, and when preparing it for copying, the saying "Look after the pennies, and the pounds will look after themselves" came to mind. So I started hunting for a big dragon, and placed him on a mighty hoard, for the other side. I'm pleased with this, although in retrospect I should have made the design darker and bolder.
I re-used this design later on, making another dragon purse for my sister. This time, the leather burned much darker and bolder. I don't know why, as I did nothing different - I think it may be the leather itself. I tried to go over my own purse again, and re-burn the outlines, as the wear it's getting has faded the design, but to no great effect - I think it must be something to do with the type of leather my purse is made out of.
The bike glasses case that I made for Bill was the first item I'd made from a photograph. It wasn't easy, but does seem to look OK. When I asked Bill what he'd like on his surprise gift (Well, I had to!), he asked for a bike picture - but not just A bike... THE bike! Our new Kawasaki VN1500, just exactly as it sits. Ah...
So, I took a digital piccy of it, fiddled with the image to bring up the contrast as much as possible, printed it, and traced it from that. Then I worked with the picture close at hand, to fill in the details. It took a long while, and it's not quite identical to the picture, but I think it's come out reasonably well. Yes, I do know that the bike as pictured has no sidestand to lean on - it's the very latest "auto-hover" model!
I have now made another glasses case, for myself, similar to Bill's. I made this design a bit bolder that the previous ones - probably a little too much so! I seem to be having a small problem with the heat of the tip varying randomly when in use... either that or I'm doing something wrong, but I don't know what it is if so!
The commissions then seemed to arrive thick & fast - it was all tigers for a while, it seemed... one commission for a glasses case, another for a bookend - eeek!
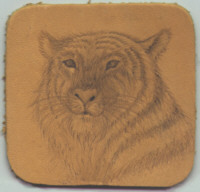 |
Before making the Reclining Tiger Glasses case, I practiced on a scrap of leather, creating this first attempt. |
Although the final commission came out OK, and the chap who ordered it says that his wife is very happy with it, I don't think tigers are my strong point! I can't seem to make the fur look like fur at all. I'm going to avoid them in future, I think...
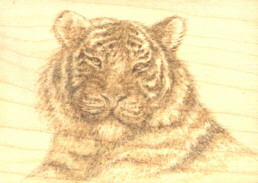 |
However, I had another, much larger tiger commission already waiting, to be done on a sycamore bookend, and in preparation I tried again, with this small version. |
Not quite so bad, I think - much furrier, and less cross-eyed.
The Keyplate was made of a bit of random wood - probably pine, which is not an ideal wood for pyrography. The difference between the hard and soft grain is considerable, making it react differently to the heat, and the grain's "stripiness" makes the effect annoyingly noticeable. I ended up returning to each line, re-burning the raised hard "stripe" of grain to get the colour more even, which is a pain when the grain's as narrow as this is.
In his usual enormously helpful fashion, Bill helped me manufacture this keyplate, which has routed edges for a nice "finished" effect. I have another one, too, as the material was long enough for two, and as I wasn't quite sure how the design would fit best. These items have to be shipped as a kit of parts, as the hooks make it impossible to post without fear of damage. This one was even too large to fit on the scanner, hence the slightly odd image.
By the end of autumn, some 9 or 10 months after I started this hobby, I had completed a large leatherwork commission for a local businessman - 50 purses and 50 keyrings, all with his company logo and other writing, which kept me quite busy for some considerable time.
Doing this many items, with such dark burning, the fumes got bad enough that I had to sort out some extraction, with Bill's help.
Come the New Year, I had completed the dreaded tiger commission - a pair of bookends. I had some problems with these, as my schedule for finishing them (adjusted to allow for practice, Christmas and for other small but urgent commissions) was severely disrupted when I was sent to work in Watford for 7 weeks!
 |
It was also somewhat awkward to work on these, because of their shape, and I had trouble with reproducting the design accurately, as it's a real-world creature. But I think they've come out OK in the end, though, and their new owner certainly seems pleased with them. | 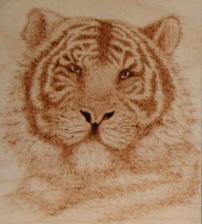
|
At the 2004 Alexandra Palace Woodworking show, in February 2004, we met Lesley and Jeff Wyatt, who I know from the UKPyros site - what nice people! Lesley had done some lovely work on tagua nuts (like little pieces of ivory) and had brought them with here - she's so talented!.
In March 2004, I completed another commission - a heart-shaped box, ordered as a wedding gift by someone who contacted me just via seeing the website! The design here is quite simple, but that's as the customer desired, saying that as the box itself was decorative, she didn't want to overpower it with design.
The box is from Dalescraft, where Colin was enormously helpful, making a beautifully-finished box of very high quality. Lovely work! This was really important, as the customer wanted the box to have an oiled finish, not a varnished one. This means that the least little roughnesses show up so much more clearly, and make it very important to get a good all-over finish, not just on the decorated surfaces, before starting work. To get the box stable enough to do the leaf border round the edge, I wiggled it securely into a cloth-covered beanbag (it's meant to be a neckwarmer!), and rested my forearm on the Yellow Pages and Thompson Local, to get my hand up high enough to work confortably. There's nothing like a phone book for an armrest - thick, stable and just large enough...
This is my latest sample piece, done from photos...
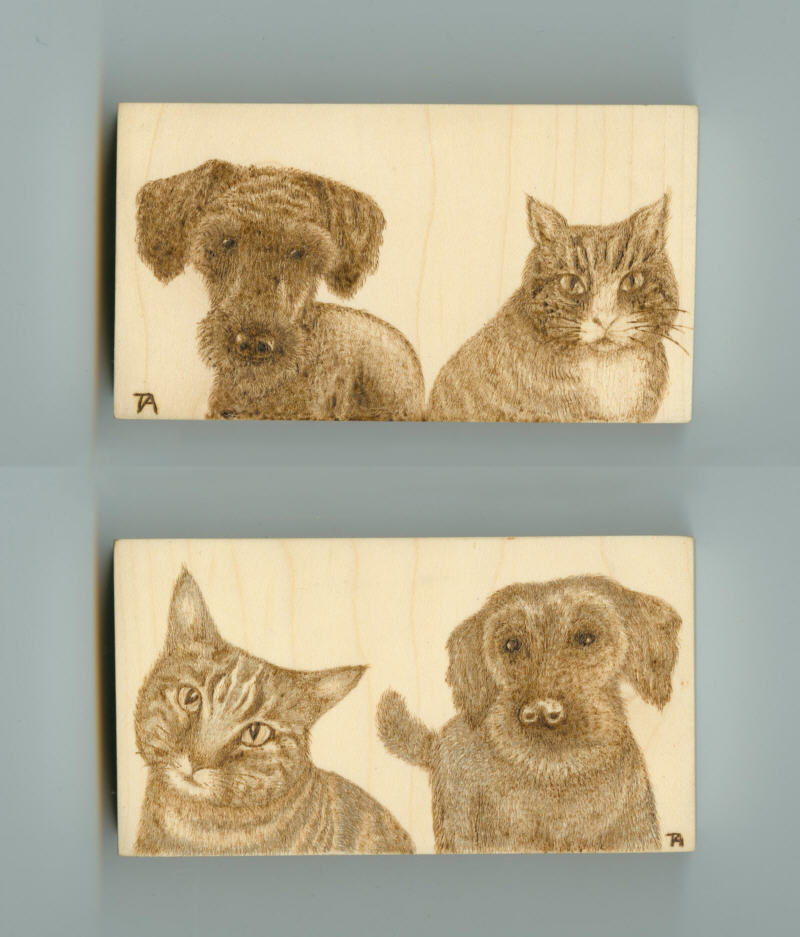
This work-in-progress is the first time I've tried to work from a mobile-phone photo of an animal.
I also do have quite a bit of material still to work on, including some odds & ends of that plywood that I liberated (sorry, Bill!) from the garage. I already have two pieces cut out - I plan to make a seascape, as suggested by the grain of one piece, and an underwater scene on the other. Plus I have a box in the formative stages of construction, a keyplate, and a hairbrush to do. And pretty much all the stuff listed on the Sales page, too - choices, choices!
You can find out more about the techniques I use here, or me here, if you're interested! "Thanks" to everybody who's helped me, and to all the great suppliers who make the items I decorate!
